Preparing a Blender 3D model for texture painting on an iPad with Procreate
I've been working on custom texture painting on my VRChat avatar1, and wanted to share my approach for getting the model into Procreate for iPad.
Procreate is a really nice, intuitive way to do this, and just feels really nice and rewarding! The main catch is that it only works with .usdz files if you want to work from existing textures.
This approach uses the Mac-only Reality Converter utility to create a .usdz file for Procreate to use - there are apparently alternatives using Pixar's USD libraries2, but this is the method I got to work.
It also presumes you've opened the .blend file, or imported your .fbx, and that you have textures available on disk as images.
Finally, note that I'm in no way a Blender expert, just a weirdo finding a way, and I am using Bforartists. Standard Blender may be laid out slightly differently.
Let's go!
Before we begin: Check Textures are intact within Blender
Just to make sure things are ready to export, let's
-
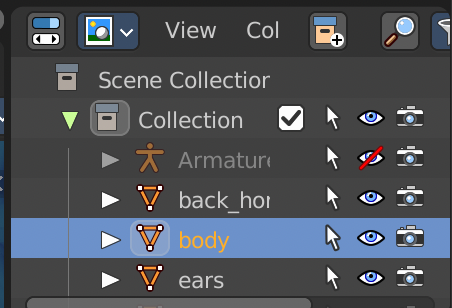
Select the body in the Outliner Editor (a.k.a. the list of objects in the scene on the right-hand side)
-
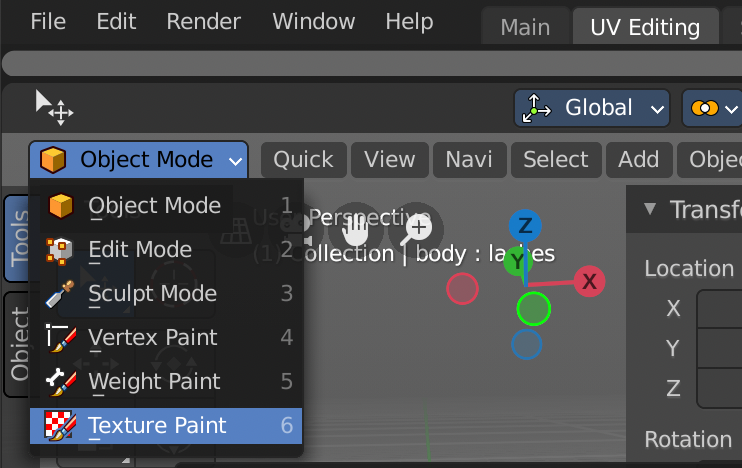
Select the UV Editing tab at the top and move into the Texture Paint mode to check the textures are valid
If the textures appear as you expect in the 3D view, we can continue!
Part 1: Shape Key/Blendshape preparation (Optional)
If you have any blendshapes (Blender calls them Shape Keys) you wish to turn on for drawing on,
-
Select the object in the Outliner Editor
-
Choose the Object Data Properties sidebar (the white triangle icon)
-
Scroll down the sidebar to Shape Keys
-
Click each blendshape you want in the list and set its value;
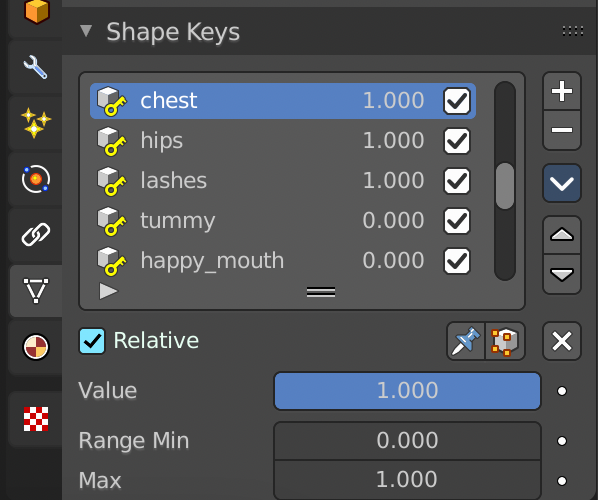
In the case of this VRChat avatar, these needed setting to
1.000, but yours might differ.
Part 2: Export to OBJ
It sounds counterintuitive, but the best way3 to export to a format that Procreate will handle is to go via .obj first. This will ensure the texture coordinates don't get messed up4.
-
In the Outliner Editor, select all the objects you want to export.
I clicked on the first item and then shift-clicked on the last to select all, but you can command-click to select individual ones - those you're targeting for export should each be outlined in orange in the main 3D view at this point -
Use File -> Export -> Wavefront (obj) and save the
obj/mtlpair to disk. You may need to toggle the Selected Only option depending on what you need exported.
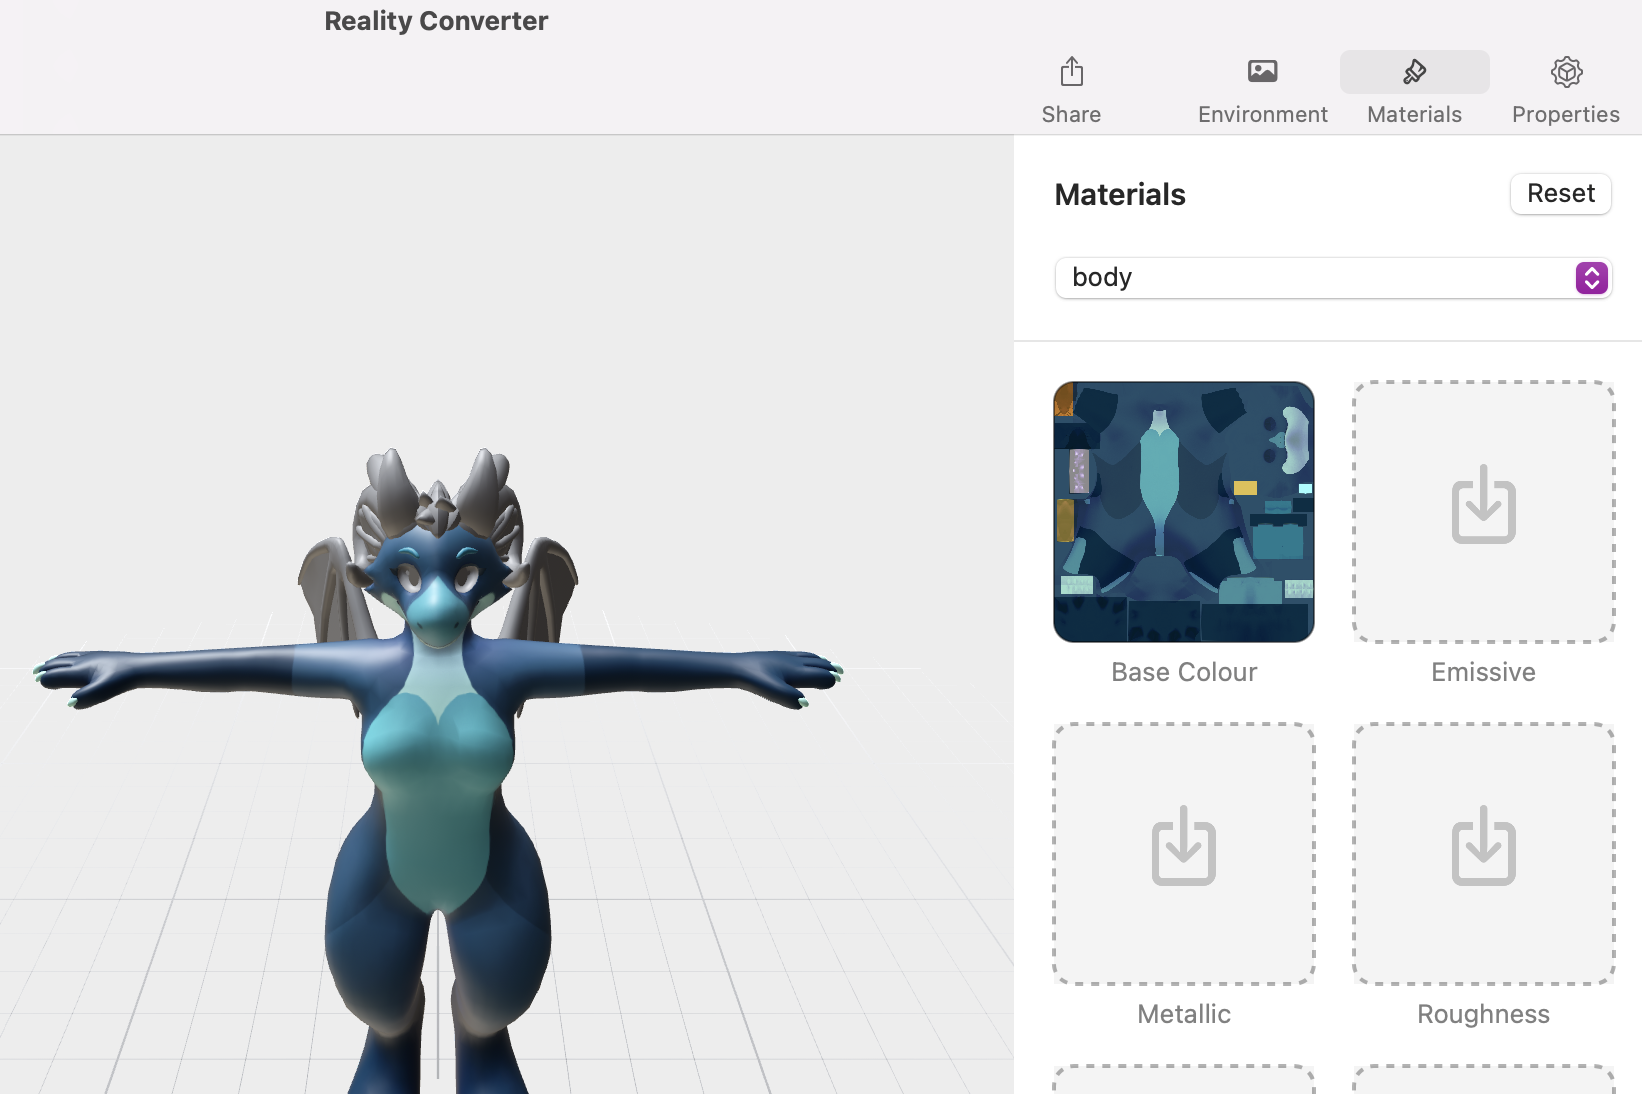
Part 3: Convert to USDZ
Open up Reality Converter and let's finish this!
-
Drag and drop the
objfile into Reality Converter, and let it do its thing.
At this point it will be missing its textures, but we're about to fix that! -
Open the Materials sidebar and drag and drop the relevant texture PNGs from disk into the relevant slots (this image shows just the “body” base colour applied to Moopdrea's Dragon avatar)
-
Use Reality Converter's Export function to export a
.usdzfile
Part 4: Procreate time
That resultant .usdz file is ready to be drawn on in Procreate. Transfer it to your iPad via AirDrop or whatever other means you wish, and open it up in Procreate. Now you're ready to start drawing! ☺️
From Procreate, you can export the textures back to your computer using the 🔧 button in the toolbar, and choosing “Share” - at the bottom of that menu is the option to export them as PNGs.
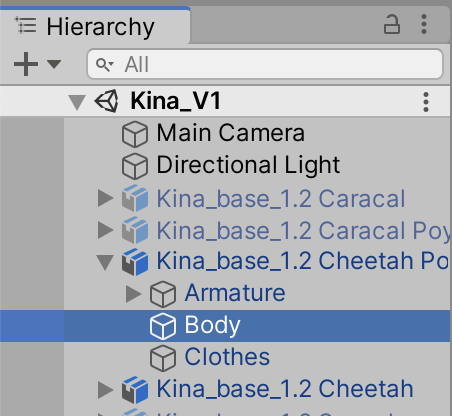
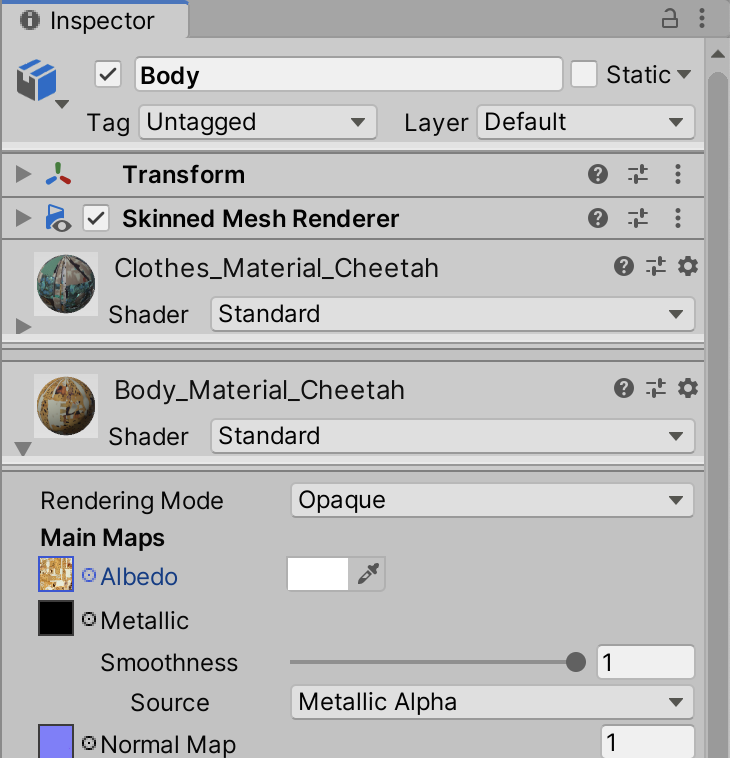
Appendix A: Getting stuff back into Unity
Unity will automatically use updated textures if you replace them on-disk while the project is open.
To confirm where Unity is loading your textures from, you can;
-
Locate the object in the Unity editor, in my case it was called “Body” and lived directly under the object which has the VRC Avatar Descriptor on it
-
Expand the materials in the Inspector sidebar and click on the little image preview next to the Albedo option under Main Maps.
-
It will now highlight the referenced texture in the Project file browser. You can click it to display the file path within the project, or use the context menu to reveal it in Finder or File Explorer.
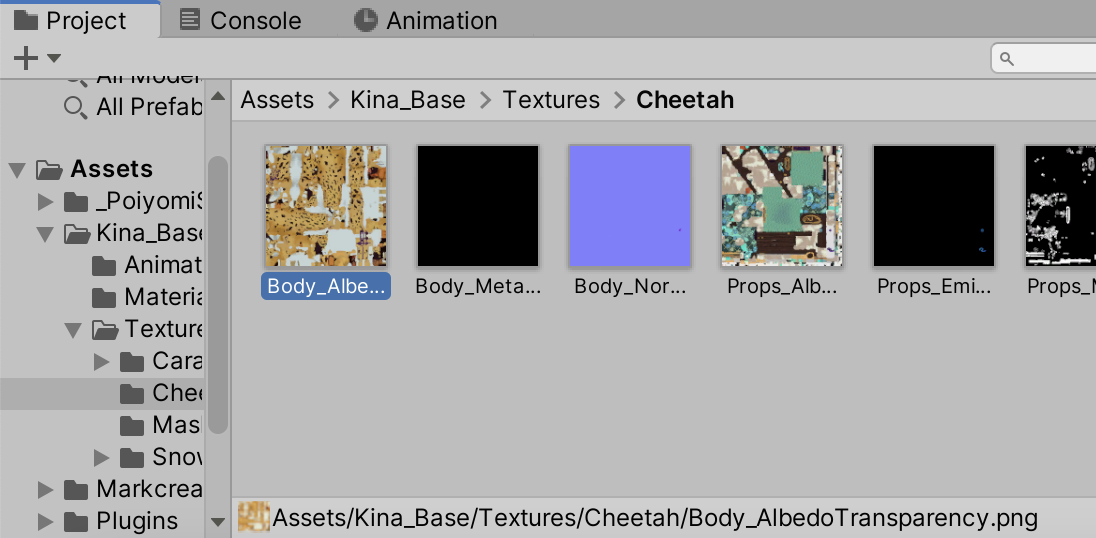
Now that you've located the textures, you should be able to overwrite them, at which point Unity will briefly pause to import them. Then it's ready for you to test and use! ☺️
Appendix B: On Physically-Based Rendering
I am not a professional technical artist, so bear with me, but this topic may be important to you!
Procreate supports textures which use physically-based rendering, a fancy-sounding term for rendering in a way that mimics real light behaviour by mapping “metalness” and “roughness” (or, in some pipelines, smoothness) onto a surface. Your VRChat avatar might too!
But if so we'll run into a small snag here - Unity and Pixar (creators of the Universal Scene Description standard which Apple's tools, and Procreate, use) decided on slightly different approaches for how to handle physically-based rendering textures.
Both need a diffuse or base colour texture, and that doesn't require changes to move between them, but the metalness and roughness textures differ;
- Unity uses a single
MetallicSmoothnesstexture file, where “metalness” comes from the red channel of the file, and “smoothness” from the alpha channel - Pixar use separate
MetallicandRoughnesstexture files, for the “metalness” and “roughness” respectively
Now, keen-eyed readers may have noticed that “smoothness” and “roughness” would seem to be the inverse of each other, and indeed that's true, 0% roughness is equivalent to 100% smoothness and vice versa. This means that in order to convert between the two, we must invert and merge, or split, the alpha channel out.
I've tried quite a few approaches to this, but the most reliable I found3 was to use ImageMagick, and I wrapped it up in a pair of shell scripts I collectively called matknife;
You'll need to run matknife-split on your texture if you have a MetallicSmoothness file, which will create the Metallic and Roughness textures, which can then be dragged into Reality Converter in Part 3.
To import textures exported from Procreate into Unity, you'll need to run matknife-merge, specifying both the Metallic and Roughness texture files, which will create a MetallicSmoothness texture file.
I hope these will help you out if you end up needing them!
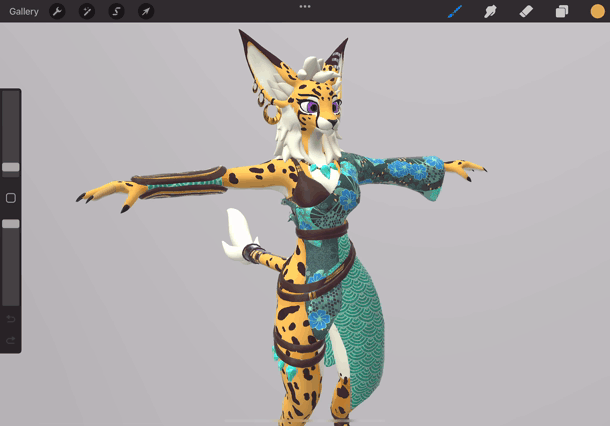
I'm using Kina by natchdeux.
Pixar don't provide pre-built copies of their tools, but Nvidia provide binaries for Windows and Linux, and Apple provide binaries for macOS.
I haven't done it myself, but if you're going command-line for this, you'll need to do some further fiddling, and I believe you'll want to use usdzconvert -iOS12, and apply textures using some other parameters.
If you know a better way to handle these, please let me know!
Blender's .usd export option doesn't work properly for including textures; 2.9 exports in a way that is missing textures, and 3.0 exports with textures but their UV positions are incorrect. There's also a third-party plugin for direct .usdz export, but it crashes in my experience.